
P3 Magnets: Poles, Materials and Making Magnets
Learn P3 magnets with examples of attraction, repulsion, magnetic materials and magnet-making, plus worked questions that explain what the evidence proves.
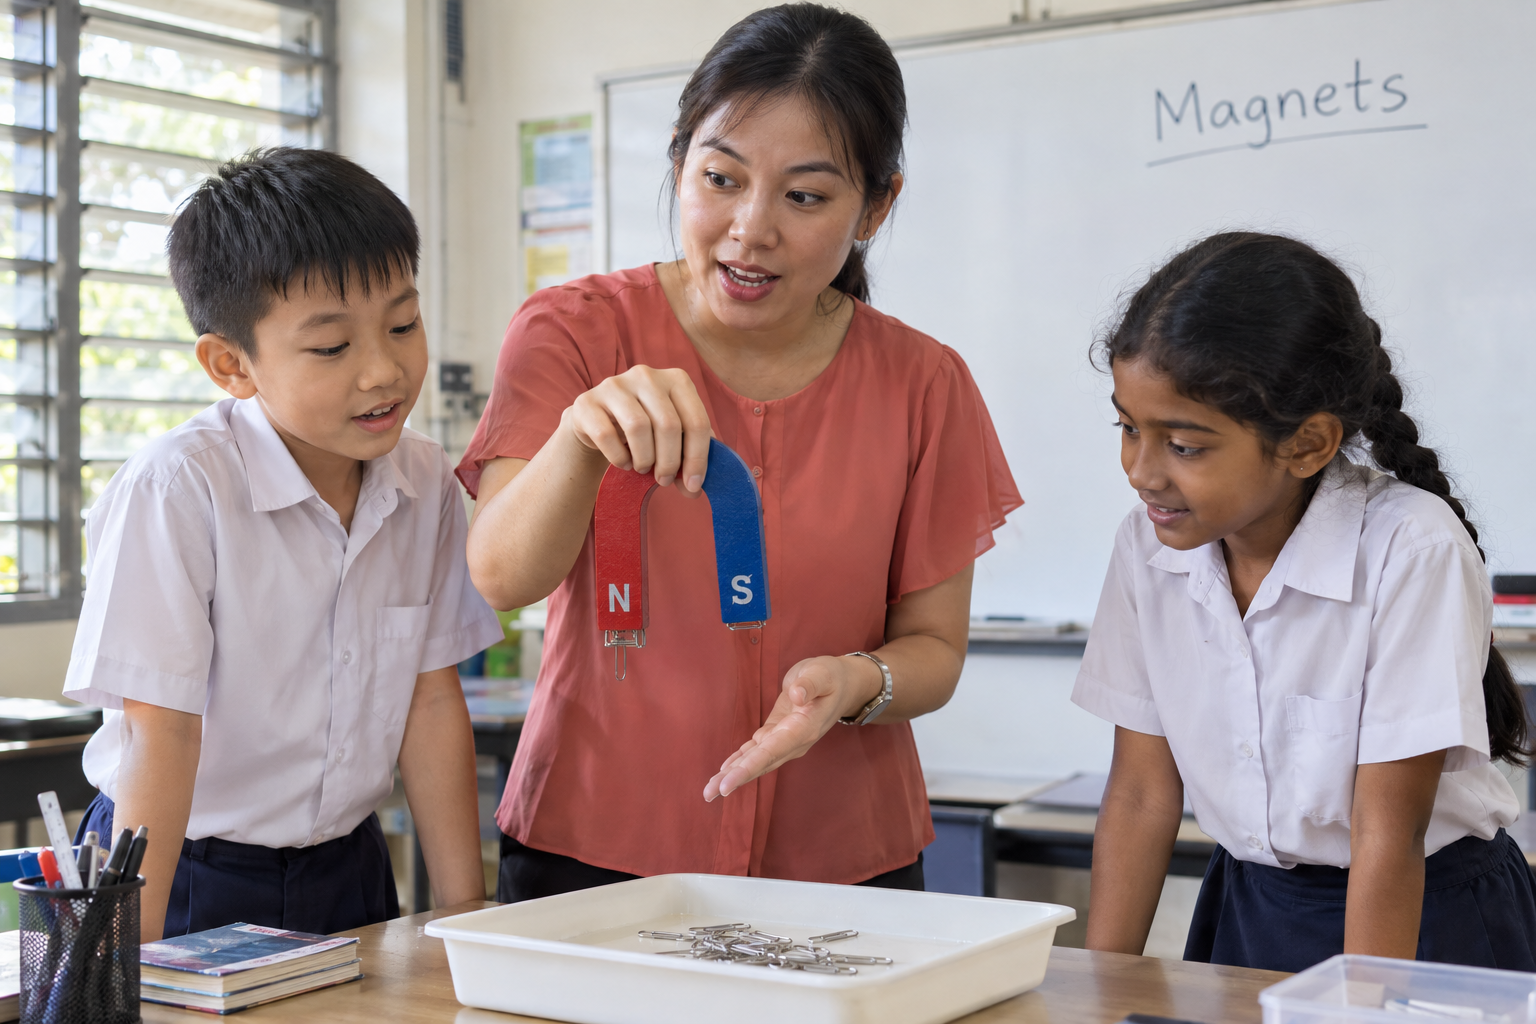
The P3 magnets topic teaches children how magnets attract and repel, which materials are attracted, and how magnets can be made and used. An object attracted to a magnet is not necessarily a magnet itself, a distinction that matters in many of the examples below.
Your child may confidently recite “like poles repel” but hesitate when the labels disappear or a magnet is turned around. The worked examples below show how to follow the evidence instead of relying on the picture's position or colour.
Key Takeaways
Like poles repel; unlike poles attract.
A magnet can attract a magnetic material that is not itself a magnet.
Repulsion helps identify a magnet in the primary classroom model.
Iron and suitable steel objects are useful examples; not every metal is magnetic.
P3 learning includes making magnets by stroking and an electrical method.
What children learn about P3 magnets
The topic belongs to Interactions in the Primary Science syllabus. It covers magnet properties, comparisons with magnetic and non-magnetic materials, everyday uses and magnet-making. The Admiralty P3 resources include both the stroke method and an electrical method.
Keep the explanation at the level of observations and simple procedures. Your child does not need magnetic-domain theory to explain why two labelled poles repel.
The school decides when to teach the topic. Our P3 Science overview connects it with the other P3 areas without assuming every school follows the same term plan.
A magnet and a magnetic material are different
A magnet has north and south poles. It can attract objects made from suitable magnetic materials and interact with other magnets.
An unmagnetised iron object can be attracted by a magnet without behaving like a permanent magnet itself. That is why “it was attracted” does not settle every identification question.
The Frontier Science Corner magnet resource explains the distinction between attraction to magnetic materials and interactions between poles. It also points out that not all metals are magnetic.
Use known samples when practising. An object that looks silver might be made from different metals or alloys. Appearance alone does not reveal its magnetic behaviour, and some stainless steels behave differently from others.
For P3, iron and suitable steel samples are the main examples to work with. If a question gives a test result, use that evidence instead of guessing from a shiny surface or an object's name.
The same habit helps with other material comparisons. Our P3 materials and their properties guide shows how to use test results to compare strength, flexibility and other properties, then explain why a material suits a particular job.
How attraction and repulsion work
Attraction is a pull together. Repulsion is a push apart. These interactions can happen before the magnets touch.
Poles facing each other | Result |
North and north | Repel |
South and south | Repel |
North and south | Attract |
South and north | Attract |
Look at the two ends facing across the gap. The far ends do not decide the interaction shown between the nearby poles.
When a bar magnet rotates, its labelled north end moves with it. It does not become south merely because it now points towards the other side of the page. Colour is only useful if a key explains what the colours mean.
Why repulsion is useful evidence
Two possibilities can explain attraction: unlike poles of two magnets, or a magnet attracting a magnetic material. Repulsion distinguishes the cases in the primary classroom model.
Haig Girls' P3 briefing explicitly teaches this point: attraction alone does not establish that an object is a magnet. Look for repulsion against a known magnet before making that conclusion.
Avoid treating a lack of visible movement as proof that a material is non-magnetic. A heavy object or friction may prevent movement. Classroom tests should use suitable samples and conditions so the intended interaction can be observed.
Worked questions on P3 magnets
These are original practice questions. The suggested answers explain the reasoning and are not official marking schemes.
Example 1: Identify the facing pole
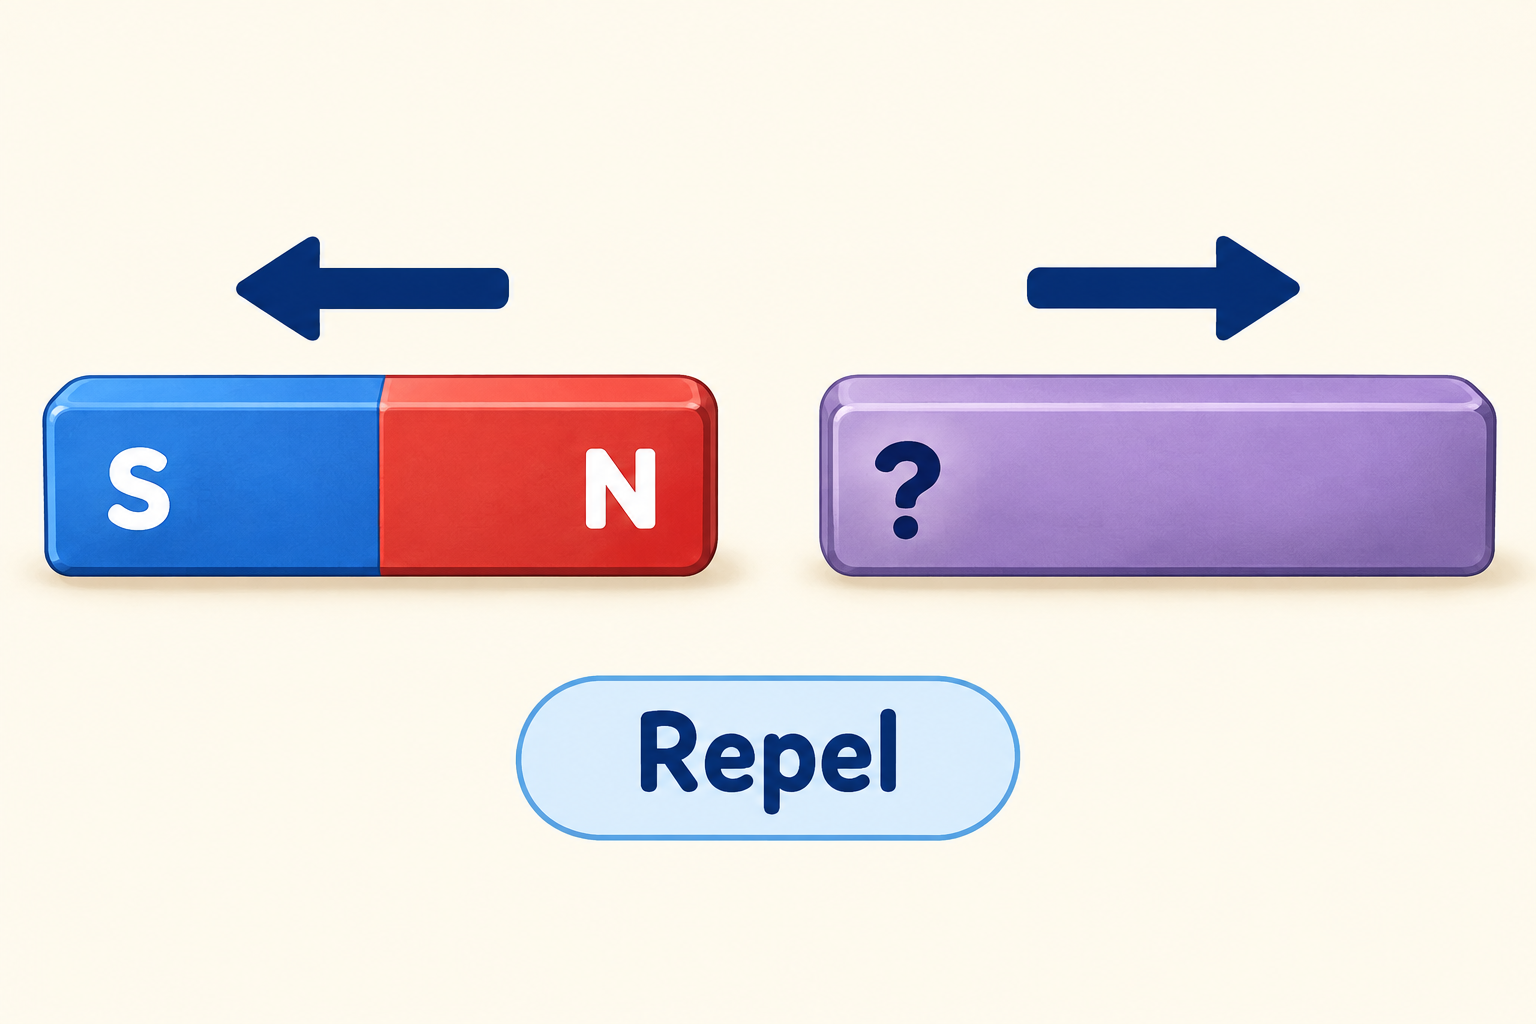
Two confirmed bar magnets repel. The facing end of the first magnet is N. What is the facing end of the second magnet?
Repulsion means the nearby poles are alike. Since the first is north, the second facing pole is also north.
Suggested answer: “The facing end is N because like poles repel.”
If asked for the other end of the second bar magnet, label it S. Check that the answer refers to the requested end; a correct rule applied to the wrong label still gives the wrong answer.
Example 2: Can attraction identify a magnet?
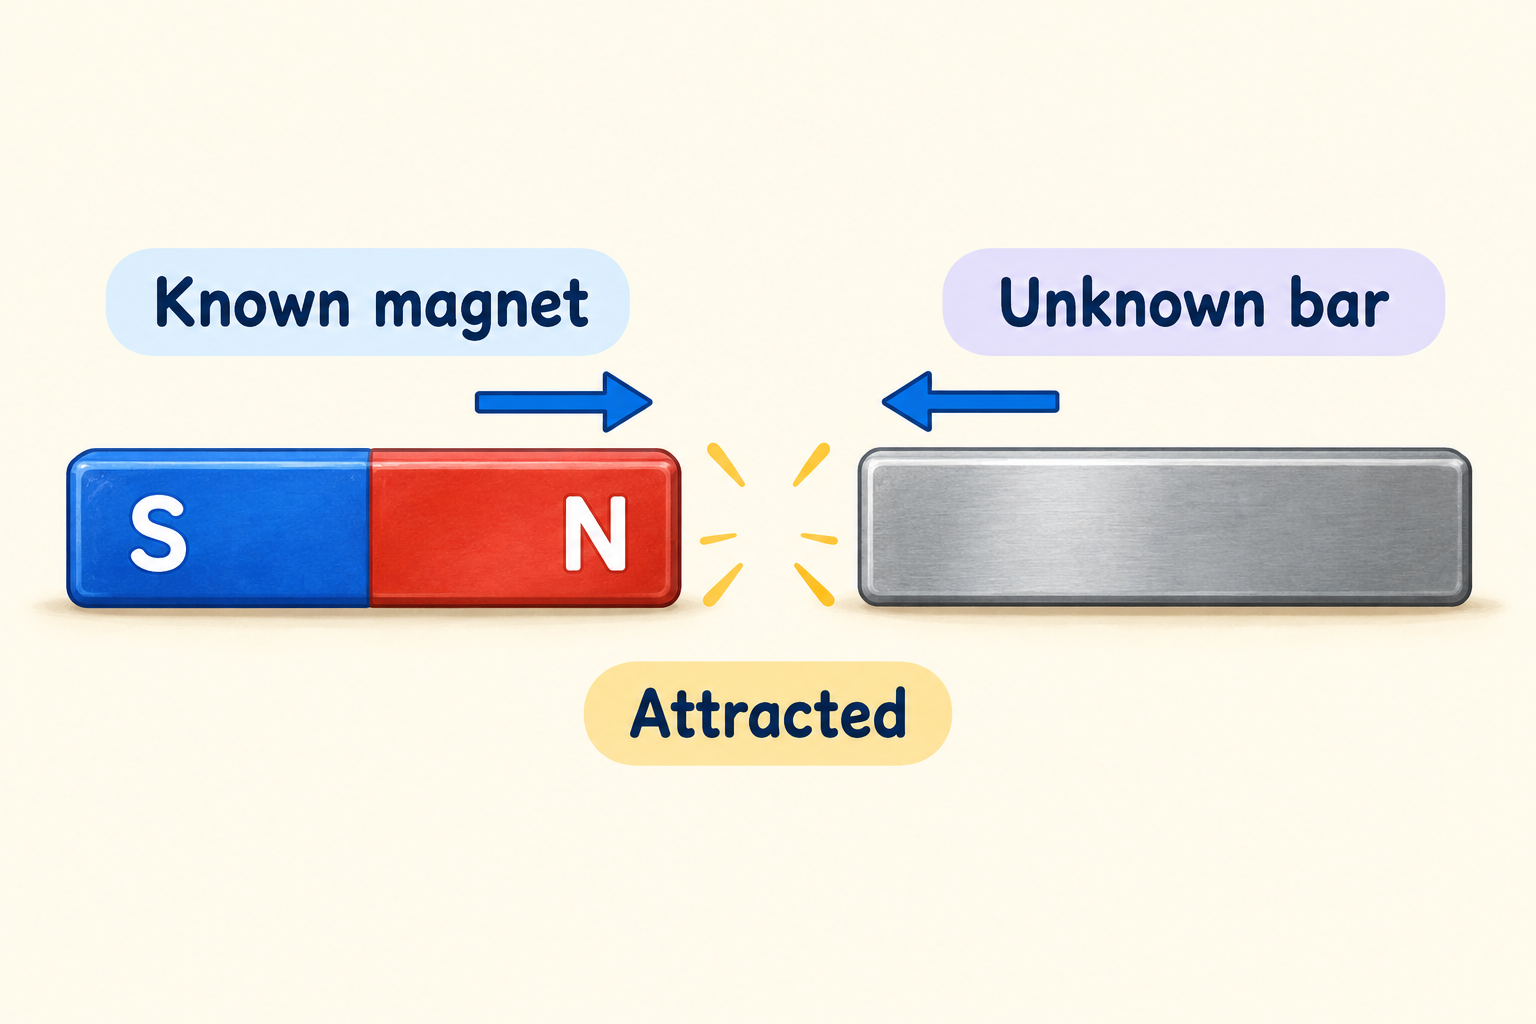
One end of an unknown bar is attracted to the north pole of a known magnet. A pupil concludes that the unknown bar must be a magnet. Is there enough evidence?
List the possible explanations before choosing an answer. The unknown bar might have a south pole facing the north pole. It might also be an unmagnetised magnetic material.
Suggested answer: “No. A magnetic material can also be attracted. Test the ends of the bar against a known magnet and look for repulsion.”
The attraction result leaves two possible explanations. The extra test helps your child decide between them.
Example 3: Rotate the magnet
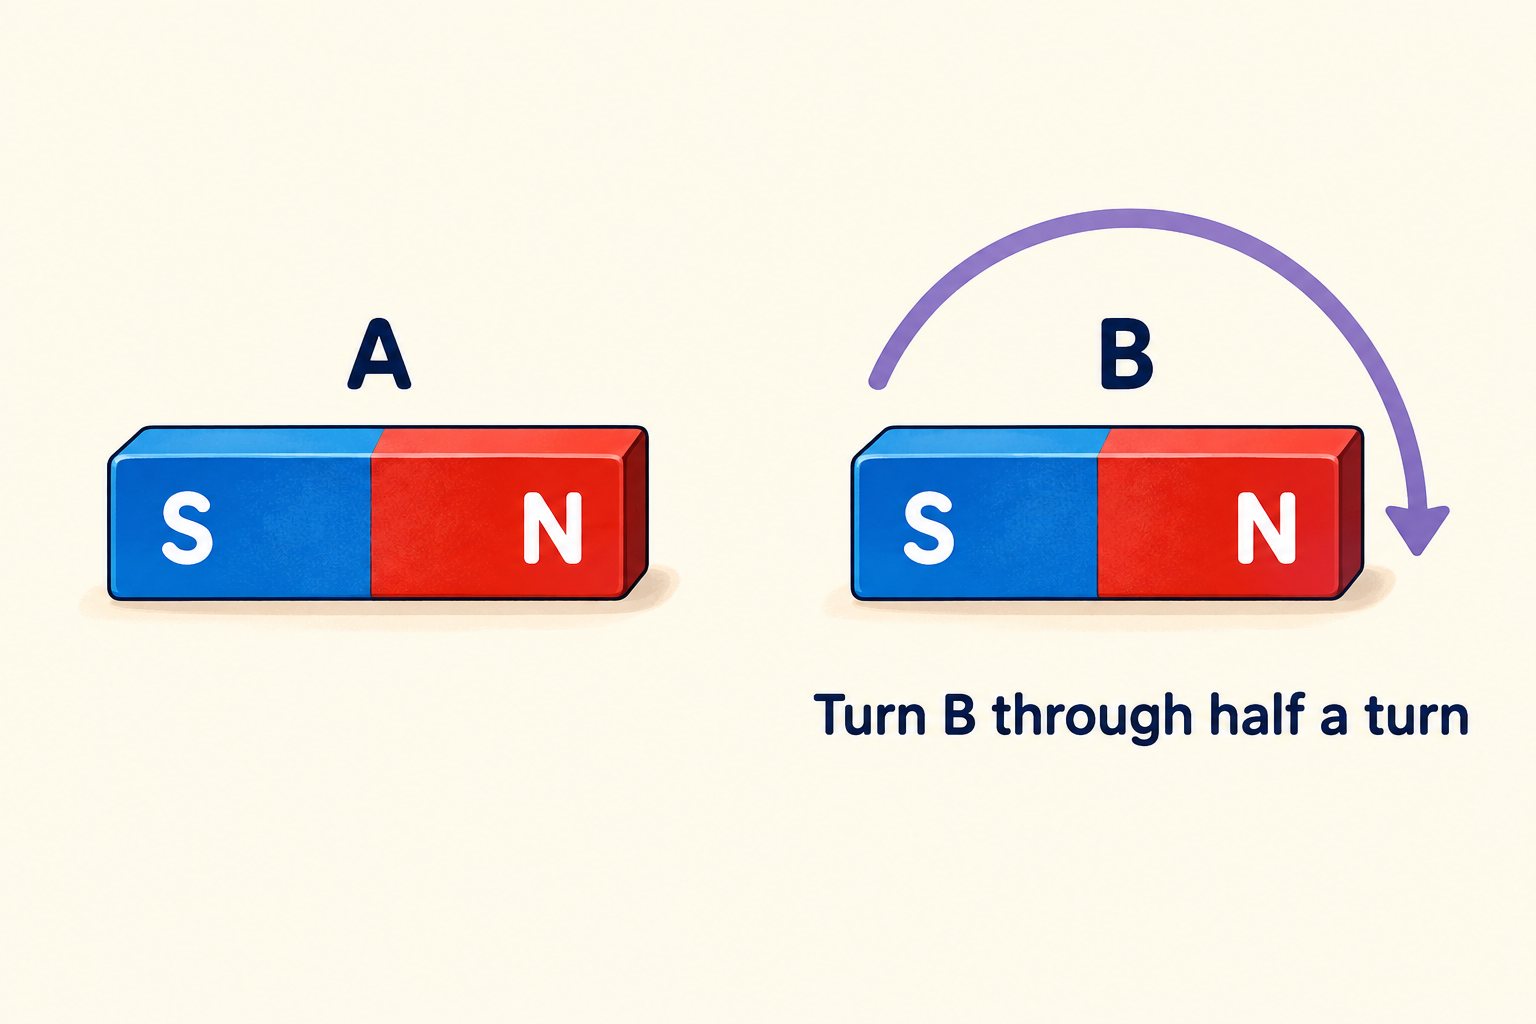
The right end of magnet A is N. The left end of magnet B is S, and those ends face each other. B is turned through half a turn so its other end faces A. What happens now?
Before turning, N faces S, so the magnets attract. After the half-turn, B's north end faces A's north end.
Suggested answer: “The magnets now repel because their north poles face each other.”
A useful checking method is to draw a short bar and carry its N and S labels through the turn. Don't relabel the magnet to keep north on the same side of the page.
Example 4: Compare strength fairly
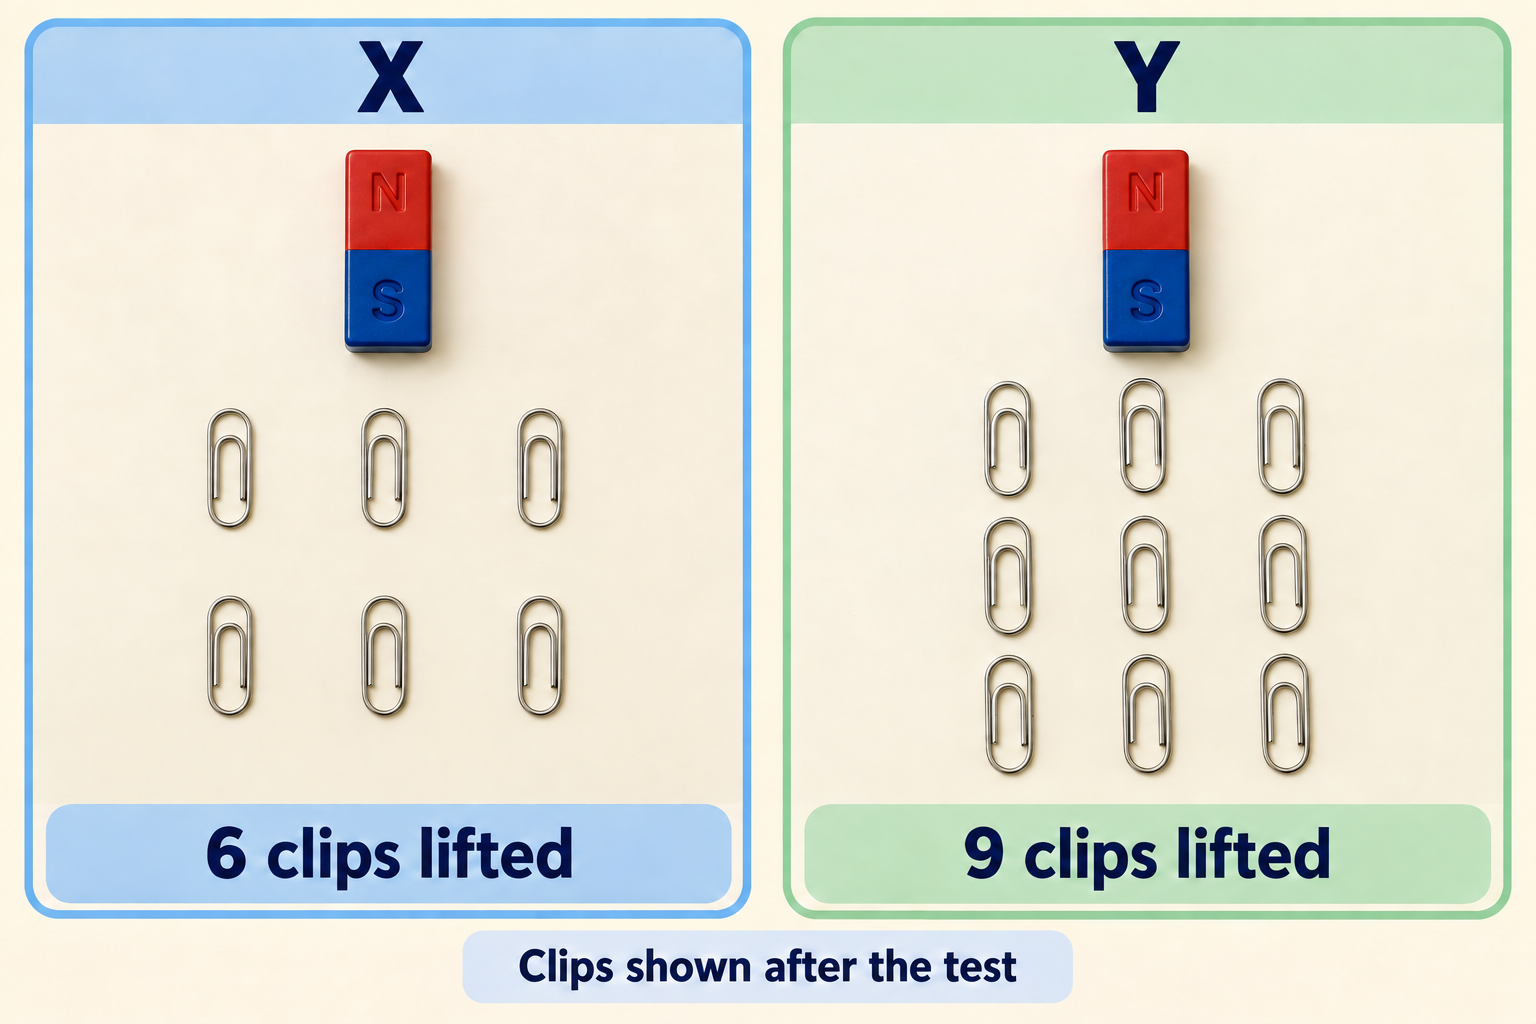
In a controlled classroom test, magnet X lifts six identical steel clips and magnet Y lifts nine. The same pole position, contact procedure and clip arrangement are used. What does the result suggest?
Suggested answer: “Y shows greater lifting strength in this test because it lifts more identical clips using the same procedure.”
Keep the conclusion tied to the test. It does not prove that every larger magnet is stronger, and it does not reveal the magnets' materials.
If the clips differed in size or the arrangement changed, comparing only the number lifted would be less useful. Identify what was kept consistent before comparing the totals.
Making and using magnets
The school-hosted MOE syllabus includes making a magnet by the stroke and electrical methods. Both can be taught through a supervised demonstration and a test of the result.
The stroke method
A suitable iron or steel object is stroked repeatedly with one pole of a magnet in the same direction. The magnet is lifted away before returning to the starting end.
For a written procedure, pay attention to consistency: the same pole, the same direction, and repeated strokes. Random rubbing backwards and forwards does not describe the intended school method.
The next step is to test the object. Simply showing that the original object was attracted to a magnet does not establish that the procedure made it into one.
The electrical method
In a classroom setup, insulated wire is coiled around a suitable magnetic core and connected to a low-voltage electrical source. The setup can behave as an electromagnet while current flows.
This belongs in a supervised activity with appropriate equipment. Use a teacher demonstration or a suitable educational kit; household mains electricity is not part of the activity. Batteries and wire can heat up, so do not leave an improvised coil connected.
For P3 revision, focus on recognising the method and describing the observations. Detailed circuit theory and explanations of magnetic domains are unnecessary here.
Connect each use to a property
A magnetic catch uses attraction to help hold a door closed. A compass uses the directional behaviour of a freely turning magnet. An electromagnet can be useful when magnetic attraction needs to be switched on and off.
For a freely suspended bar magnet, the expected resting orientation is North-South, away from nearby magnets or other interfering magnetic objects. The physical setup matters: the magnet must be able to turn freely.
When explaining a use, name the helpful property. “Magnets are useful” does not explain why the particular object works.
Practise with predictions, then observations
Use two large classroom magnets with clearly marked poles. Keep small loose magnets away from young children. Before bringing the magnets together, have your child predict the interaction and point to the facing ends.
Record the prediction, observation and explanation in three short columns. If the prediction is wrong, redraw the poles and try to find where the reasoning changed.
You can also practise without equipment by sketching bar magnets on paper. Cover one pole label, give an attraction or repulsion result, and ask your child to infer the missing label. Always say whether both objects are confirmed magnets.
That final detail matters. A question about two known magnets and one about an unknown metal bar do not provide the same evidence.
Frequently asked questions
Are all metals magnetic?
No. Use suitable known samples or the information provided in the question. Don't decide from colour or shine.
Does rotating a magnet change its poles?
No. The north and south ends move with the magnet. Rotation changes which end faces another object.
Is making an electromagnet beyond P3?
The electrical magnet-making method is included in P3. That does not mean detailed electricity theory is required. Our Science topics by level guide separates the later electrical-systems topic.
How Ottodot helps with OEQs
In Lower Primary Science classes, teachers model how to track facing poles and decide what a result proves. Children practise precise words such as “attract”, “repel” and “magnetic material”.
CER means Claim, Evidence and Reasoning. For a pole question, a child states the label, cites the observed interaction and explains the relevant rule. Guided examples come before independent attempts.
Ottodot's OEQ games use scenarios or simulations with prompts that are gradually removed. Class feedback and teacher-marked weekly homework help identify where an explanation breaks down. Separate topic games such as Polarity Blitz reinforce identifying magnet polarity; they do not replace teacher-led explanation practice.
If your child knows the rules but gets lost when a diagram changes, Check my child's fit to explore support with applying them.